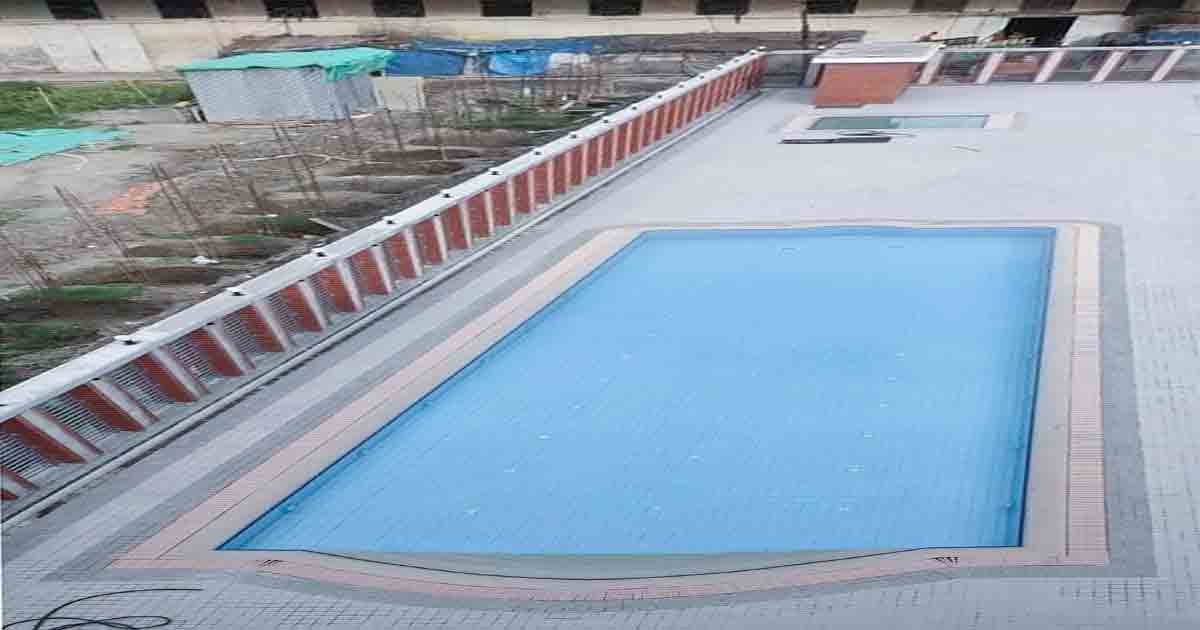
Swimming pool tile installation
Swimming pool tile installation is a specialized process that requires careful planning, precise execution, and knowledge of materials suitable for aquatic environments. Proper installation not only enhances the aesthetic appeal of the pool but also ensures durability, functionality, and safety. In this comprehensive description, we will explore the importance of professional installation, the steps involved in tile installation, types of tiles and materials used, considerations for selecting tiles, maintenance requirements, and safety considerations.
Importance of Professional Swimming Pool Tile Installation
Professional Swimming pool tile installation is crucial for several reasons:
- Waterproofing: Properly Swimming pool tile installation create a watertight barrier that prevents water from penetrating the pool structure, which can lead to damage and structural issues over time.
- Aesthetic Appeal: Well-executed Swimming pool tile installation enhances the visual appeal of the pool area, creating a luxurious and inviting atmosphere for swimmers and guests.
- Durability: Professionally Swimming pool tile installation are less likely to crack, shift, or become loose over time, ensuring long-term durability and minimizing maintenance costs.
- Safety: Correctly installed tiles provide a smooth and slip-resistant surface, reducing the risk of accidents and injuries around the pool area.
Steps Involved in Swimming Pool Tile Installation
Swimming pool tile installation typically involves the following steps:
- Surface Preparation:
- Cleaning: Thoroughly clean the pool substrate to remove dirt, debris, and contaminants that could affect adhesive bonding.
- Leveling: Ensure the substrate is level and free of bumps or irregularities that could cause tiles to sit unevenly.
- Tile Layout and Design:
- Design Planning: Plan the layout and design of the tiles, considering factors such as tile size, pattern, color scheme, and placement of accent tiles or mosaics.
- Dry Layout: Perform a dry layout of tiles to visualize the design and make any necessary adjustments before applying adhesive.
- Adhesive Application:
- Selecting Adhesive: Choose an appropriate adhesive based on tile material, substrate type, and environmental conditions. Options include epoxy adhesive for durability or polymer-modified thin-set mortar for flexibility.
- Application: Apply adhesive to the pool substrate using a notched trowel, ensuring even coverage and adequate thickness to support the weight of the tiles.
- Tile Installation:
- Setting Tiles: Carefully place each tile into the adhesive, pressing firmly to ensure full contact and proper alignment with adjacent tiles.
- Spacing: Use tile spacers to maintain consistent grout joints and allow for expansion and contraction due to temperature changes.
- Grouting:
- Grout Selection: Choose grout suitable for swimming pools, such as epoxy grout for its durability and resistance to water and chemicals.
- Application: Apply grout using a grout float, pressing it into the joints between tiles at a 45-degree angle to ensure complete filling without voids.
- Cleaning: Remove excess grout from tile surfaces with a damp sponge before it dries, taking care not to remove grout from the joints.
- Finishing Touches:
- Sealing: Once the grout has cured, apply a suitable sealer to protect the tiles and grout from stains, water penetration, and UV damage.
- Cleaning: Clean the tile surfaces thoroughly to remove any adhesive or grout residues before allowing the Swimming pool tile installation to fill with water.
Types of Tiles and Materials Used
Several types of tiles and materials are suitable for swimming pool installations, each offering unique properties and aesthetic options:
- Ceramic Tiles: Traditional ceramic tiles are popular for their durability, affordability, and versatility in various colors and designs. They are suitable for both interior and exterior pool surfaces.
- Porcelain Tiles: Porcelain tiles are highly durable, resistant to stains, scratches, and fading. They offer a wide range of finishes, including matte, glossy, and textured options, ideal for high-traffic pool areas.
- Glass Tiles: Glass tiles add a luxurious and reflective quality to pool surfaces, creating stunning visual effects underwater. They are available in an array of colors, finishes, and sizes, enhancing design flexibility and creativity.
- Mosaic Tiles: Mosaic tiles are small tiles mounted on mesh sheets, allowing for intricate designs, patterns, and custom artwork in swimming pools. They are available in ceramic, glass, or porcelain materials, offering versatility in design options.
Considerations for Selecting Tiles
When selecting tiles for swimming pool installation, consider the following factors:
- Durability: Choose tiles that are resistant to water, chemicals, UV exposure, and wear-and-tear to ensure longevity and minimal maintenance.
- Slip Resistance: Opt for tiles with textured surfaces or slip-resistant coatings to enhance safety around the pool area.
- Aesthetic Appeal: Select tiles that complement the overall design theme of the pool and surrounding landscape, considering color, pattern, and finish options.
- Maintenance: Consider ease of cleaning and maintenance requirements, as well as resistance to staining, algae growth, and discoloration.
Maintenance Requirements
Proper maintenance of swimming pool tiles ensures their longevity and aesthetic appeal:
- Regular Cleaning: Clean tiles regularly using a mild detergent or specialized cleaner to remove dirt, oils, and contaminants.
- Grout Maintenance: Inspect grout joints periodically for cracks, gaps, or signs of deterioration, and repair or replace grout as needed to prevent water infiltration.
- Sealing: Periodically apply a suitable sealer to protect tiles and grout from stains, water penetration, and UV damage.
- Inspection: Conduct routine inspections of tiles for signs of damage, cracks, or loose tiles, and address any issues promptly to prevent further damage.
Safety Considerations
Safety is paramount during swimming pool tile installation:
- Personal Protective Equipment: Wear gloves, eye protection, and appropriate clothing to protect against exposure to adhesives, grouts, and cleaning chemicals.
- Slip Hazards: Take precautions to prevent slips and falls on wet surfaces during installation, ensuring proper signage and barriers where necessary.
- Tool Safety: Use tools and equipment properly to minimize the risk of injury, following manufacturer guidelines and safety instructions.
Swimming pool tile installation requires precision and the right materials to ensure a durable and beautiful finish. Proper installation not only enhances the pool’s aesthetic but also ensures longevity and safety in a wet environment.
Steps for Swimming Pool Tile Installation
- Surface Preparation: The pool surface must be clean, smooth, and free from debris or old adhesive. This ensures a strong bond between the tiles and the pool surface. A waterproofing membrane is often applied to prevent leaks.
- Select High-Quality Adhesive: Use a waterproof, flexible adhesive such as epoxy-based or modified thin-set mortar to accommodate the pool’s exposure to water and temperature changes.
- Tile Placement: Begin installing tiles from the center of the pool floor and walls, pressing them firmly into the adhesive. Tile spacers can be used to ensure uniform spacing between tiles.
- Grouting: Once the adhesive has dried, apply a pool-safe grout to fill the joints between tiles. Waterproof grout is critical to preventing water from seeping behind the tiles.
- Curing and Sealing: Allow the adhesive and grout to cure fully before refilling the pool with water.
Proper tile installation in swimming pools guarantees a long-lasting, water-resistant, and visually appealing pool.
Installing tiles in a swimming pool adds a stunning visual appeal while providing a durable and easy-to-clean surface. Pool tile installation, however, requires careful planning and precision, as pool tiles must withstand constant exposure to water, chemicals, and temperature fluctuations. This guide walks you through the essentials of pool tile installation, including preparation, choosing materials, and a step-by-step installation process to help you achieve a professional-quality finish.
1. Choosing the Right Pool Tiles
Selecting the appropriate tile type is the foundation for a successful pool tile installation. Here are some tile types commonly used in pools:
- Porcelain Tiles: Durable, water-resistant, and versatile, porcelain tiles are one of the most popular choices for pool installations. They are dense and non-porous, making them ideal for submerged applications.
- Glass Tiles: Known for their reflective beauty, glass tiles add a shimmering effect to pools, especially when sunlight hits them. They are also highly resistant to water and chemicals but can be more fragile during installation.
- Mosaic Tiles: Typically made of glass or ceramic, mosaic tiles are small and arranged in patterns, adding a unique, custom look. They work well for waterlines, steps, and intricate designs.
- Ceramic Tiles: Ceramic tiles are often used for pool decks and surrounding areas but can also be suitable for pool interiors if they’re rated for submersion.
When choosing tiles, make sure they’re rated for pool use and are frost-proof if your pool is outdoors in a cold climate.
2. Preparing the Pool Surface
Proper surface preparation is crucial for tile adhesion. Here’s how to get the pool ready for tiling:
- Drain the Pool: For a new pool, this isn’t necessary, but for a remodel or repair, drain the pool completely and ensure the surface is dry before beginning.
- Clean the Surface: Clean the surface thoroughly, removing any dust, dirt, and grease. Any residue can interfere with adhesive bonding, so take extra care to ensure a spotless surface.
- Smooth and Level the Surface: Patch any cracks or rough areas on the pool shell with a cement-based filler or a waterproof mortar. A smooth, even surface helps the tiles adhere properly.
- Apply Waterproofing (if needed): Depending on the pool’s material, you may need to apply a waterproofing layer to prevent water seepage and protect the underlying structure.
3. Step-by-Step Pool Tile Installation
Once you’ve prepared the surface, it’s time to start installing the tiles. Follow these steps for a successful installation:
Step 1: Plan Your Layout
Map out your tile layout, starting with reference lines to ensure tiles are placed evenly. Use a chalk line to mark horizontal and vertical guides, which will help you align the tiles uniformly.
Step 2: Mix and Apply the Adhesive
Select a high-quality, waterproof adhesive specifically designed for pool tile installation, such as modified thinset or epoxy adhesive. Mix the adhesive according to the manufacturer’s instructions to get the right consistency. Using a notched trowel, spread a layer of adhesive on a small section of the pool surface, starting from the bottom and working your way up. Avoid applying adhesive to large sections at once, as it can dry out before the tiles are installed.
Step 3: Set the Tiles
Press each tile firmly into the adhesive, twisting slightly to ensure good contact and eliminate air gaps. Use tile spacers to maintain consistent spacing between tiles, which is essential for even grout lines later. Be precise, as tiles in a pool need to be evenly aligned for both aesthetics and functionality.
Step 4: Cutting Tiles
When you reach edges or curves, use a wet saw to cut tiles to the required shape and size. A wet saw provides clean cuts and helps prevent tiles from cracking or chipping, especially for more fragile materials like glass.
Step 5: Let the Adhesive Cure
Allow the adhesive to cure fully before proceeding to the grouting step. This usually takes 24-48 hours, depending on the type of adhesive used. Curing ensures the tiles are firmly bonded to the pool shell.
4. Grouting the Tiles
Once the adhesive has cured, it’s time to fill in the spaces between the tiles with grout. Choose a grout that’s water-resistant and suitable for submerged use.
- Mix and Apply the Grout: Mix the grout according to the manufacturer’s instructions, then use a grout float to apply it to the tile joints. Press the grout firmly into the spaces to eliminate any air pockets.
- Remove Excess Grout: Use a damp sponge to wipe off any excess grout from the tile surfaces, being careful not to disturb the grout lines. Rinse the sponge frequently and continue wiping until the tile surfaces are clean.
- Allow the Grout to Cure: Let the grout cure completely according to the product instructions. This usually takes 48-72 hours.
5. Sealing and Finishing
Sealing is an optional step but can add an extra layer of protection to both the tiles and grout:
- Apply a Grout Sealer: Once the grout has cured, apply a grout sealer to help prevent water and chemical infiltration. This prolongs the life of the grout and keeps it looking clean.
- Inspect the Installation: Check the tiles and grout for any cracks, gaps, or areas that need touch-up. It’s easier to fix small issues at this stage than after filling the pool.
6. Refilling the Pool and Ongoing Maintenance
After the adhesive and grout have fully cured and any sealer has dried, you can refill the pool. This step requires patience to avoid disrupting the fresh tile work. Here are a few maintenance tips to help preserve your pool’s tiles:
- Maintain Water Chemistry: Keeping pH and chlorine levels balanced prevents mineral buildup and extends the life of the grout.
- Regular Cleaning: Clean the waterline and tile surfaces regularly to prevent algae growth and calcium deposits. Use a non-abrasive cleaner and a soft brush to avoid scratching the tiles.
- Inspect for Damage: Periodically check for any cracked or loose tiles. Prompt repair will prevent minor issues from becoming more serious.


