Swimming pool tile repair
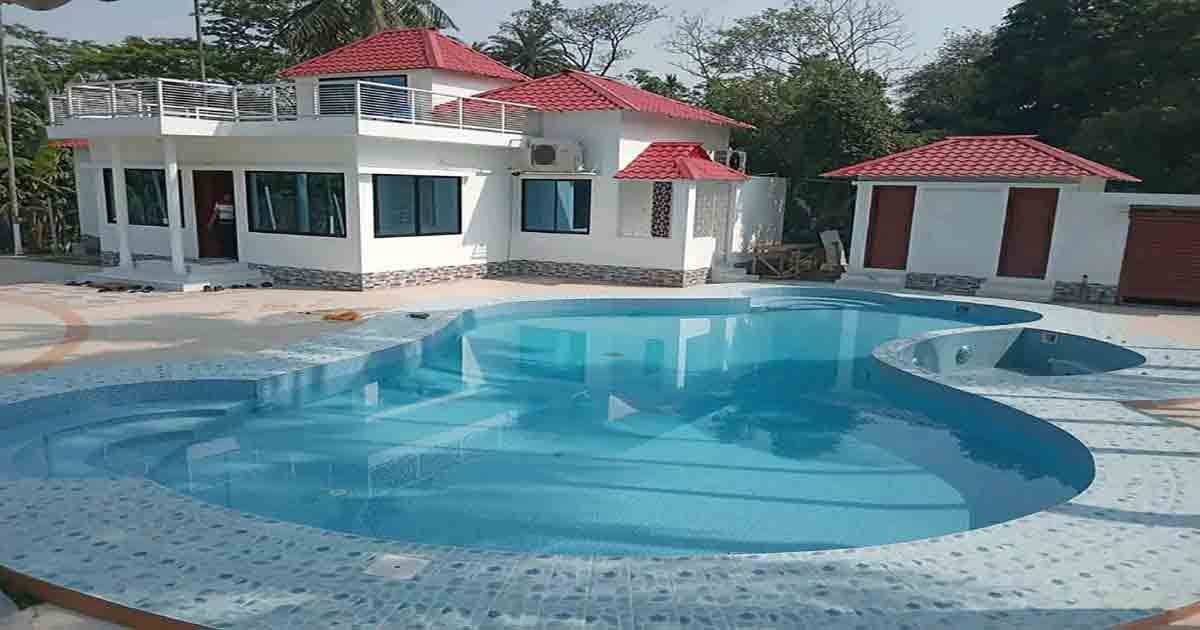
Swimming pool tile repair is a crucial aspect of pool maintenance that involves fixing cracked, damaged, or loose tiles to ensure the integrity, safety, and aesthetic appeal of the pool surface. Proper repair techniques and materials are essential to prevent water infiltration, further damage, and potential hazards to swimmers. In this comprehensive description, we will explore the importance of tile repair, common types of tile damage, repair methods, materials and tools needed, safety considerations, and best practices for effective swimming pool tile repair.
Importance of Swimming Pool Tile Repair
Maintaining the integrity and appearance of swimming pool tiles is essential for several reasons:
- Prevention of Water Leakage: Cracked or damaged tiles can allow water to seep into the pool substrate, potentially causing structural damage over time. Repairing damaged tiles promptly helps prevent costly repairs and water loss.
- Safety: Loose or broken tiles pose a safety hazard to swimmers, as they can cause cuts, abrasions, or slips. Repairing damaged tiles ensures a smooth and safe swimming surface.
- Aesthetic Appeal: Cracked or missing tiles detract from the overall appearance of the pool area. Repairing tiles restores the visual appeal of the pool, enhancing its attractiveness and value.
- Longevity of Pool Components: Properly maintained tiles contribute to the longevity of other pool components, such as grout, coping, and the pool shell, by preventing water damage and deterioration.
Common Types of Tile Damage
Swimming pool tiles can sustain various types of damage over time, including:
- Cracks: Cracks can occur due to structural movement, freeze-thaw cycles, or impact damage. They compromise the tile’s integrity and can lead to further cracking if not repaired promptly.
- Loose Tiles: Tiles may become dislodged due to inadequate adhesive, substrate movement, or improper installation. Loose tiles can create tripping hazards and allow water to penetrate behind the tiles.
- Staining and Discoloration: Minerals, chemicals, algae, and other contaminants can cause stains or discoloration on tile surfaces, detracting from their appearance.
- Grout Failure: Grout between tiles can deteriorate over time due to exposure to chemicals, water, and wear-and-tear, leading to gaps or crumbling grout lines.
Repair Methods for Swimming pool tile repair
Effective repair methods depend on the type and extent of tile damage. Common repair techniques include:
- Tile Replacement: For cracked or broken tiles, replacement is often the most effective solution. The damaged tile is carefully removed, and a new tile of the same size, shape, and color is installed using appropriate adhesive.
- Grout Repair: Damaged or deteriorated grout can be repaired by removing the old grout, cleaning the joints thoroughly, and applying new grout to ensure a secure seal between tiles. Epoxy grout is often preferred for its durability and resistance to water and chemicals.
- Re-Adhering Loose Tiles: Loose tiles can be re-secured by applying fresh adhesive to the back of the tile and pressing it firmly into place. Ensure the substrate is clean and dry before re-adhering the tile to promote a strong bond.
- Stain Removal: Stubborn stains or discoloration can be treated using specialized tile cleaners, abrasive pads, or chemical treatments designed to lift stains without damaging the tile surface.
Materials and Tools Needed for Swimming pool tile repair
The following materials and tools are commonly used for swimming pool tile repair:
- Replacement Tiles: Matching replacement tiles that are compatible with existing tiles in size, shape, color, and material.
- Tile Adhesive: Waterproof adhesive suitable for swimming pool environments, such as epoxy adhesive or polymer-modified thin-set mortar.
- Grout: Epoxy grout or cement-based grout suitable for swimming pools, chosen based on durability, water resistance, and compatibility with tile materials.
- Grout Saw or Removal Tool: Tool for removing old grout from between tiles to prepare for grout repair or replacement.
- Grout Float: Tool for applying new grout into the joints between tiles, ensuring a smooth and even finish.
- Sponge and Bucket: For cleaning tile surfaces and applying water during grouting.
- Tile Cleaner: Mild detergent or specialized cleaner for removing dirt, oils, and contaminants from tile surfaces before repair.
- Safety Equipment: Gloves, eye protection, and, if working with harsh chemicals, a respirator to ensure personal safety.
Safety Considerations
When performing swimming pool tile repair, safety should be a top priority:
- Chemical Exposure: Use cleaners and adhesives in a well-ventilated area, and wear appropriate protective equipment to avoid skin contact or inhalation of fumes.
- Slippery Surfaces: Wet tile surfaces can be slippery. Take precautions to prevent slips and falls, such as wearing non-slip footwear and using caution when moving around the pool area.
- Electrical Hazards: Avoid contact with electrical components near the pool area to prevent the risk of electrical shock.
Best Practices for Effective Tile Repair
Follow these best practices to ensure successful swimming pool tile repair:
- Inspect Regularly: Conduct routine inspections of pool tiles to identify any signs of damage or deterioration early.
- Address Issues Promptly: Promptly repair cracked, loose, or damaged tiles to prevent further damage and maintain the integrity of the pool surface.
- Use Compatible Materials: Select repair materials that are compatible with existing tiles, grout, and pool conditions to ensure long-lasting repairs.
- Follow Manufacturer Instructions: Adhere to manufacturer instructions for mixing adhesive, applying grout, and allowing sufficient curing time to achieve optimal results.
- Clean and Maintain: Clean tiles regularly and perform maintenance tasks to extend the lifespan of repaired areas and prevent future damage.
Swimming pool tile repair is essential to maintaining the aesthetics and functionality of your pool. Over time, tiles can become cracked, loose, or chipped due to constant exposure to water, chemicals, and weather. Addressing these issues promptly ensures your pool stays safe and visually appealing.
Steps in Swimming Pool Tile Repair
- Identify Damaged Tiles: The first step is to inspect and locate cracked, chipped, or loose tiles. Early detection helps prevent water seepage behind the tiles, which can cause more extensive damage.
- Remove and Replace Tiles: Once damaged tiles are identified, carefully remove them using a hammer and chisel. Clean the surface thoroughly to ensure proper adhesion of the replacement tile.
- Use Quality Tile Adhesive: Apply a waterproof tile adhesive, ensuring the new tile is securely attached. After setting, grout the tile joints with pool-safe grout to prevent leaks and ensure a uniform finish.
- Allow Proper Curing Time: After the repair, allow sufficient time for the adhesive and grout to cure before refilling the pool.
Regular tile repair for swimming pools helps maintain the pool’s structure and prevents further issues, keeping your pool in optimal condition.
Over time, swimming pool tiles may crack, chip, or loosen due to exposure to water, chemicals, temperature changes, and general wear. Damaged tiles not only detract from the pool’s appearance but can also pose safety hazards. Regular tile inspection and timely repair can prevent further damage, saving you time and money in the long run. This guide covers common pool tile issues, step-by-step repair methods, and tips for maintaining a pristine, safe pool.
1. Common Causes of Tile Damage
Understanding the causes of tile damage helps in taking preventive measures and choosing the right repair methods. Here are some typical causes:
- Temperature Fluctuations: Temperature changes cause pool materials to expand and contract, which can lead to tile cracks and looseness. Outdoor pools, especially in areas with seasonal temperature extremes, are particularly susceptible.
- Water Chemistry Imbalance: Unbalanced pH levels and high calcium hardness can lead to mineral deposits on tiles, making them more prone to cracking or loosening over time.
- Physical Impact: Objects accidentally dropped into the pool or pool maintenance equipment bumping against tiles can chip or crack the tile surface.
- Age and Wear: Over time, grout and adhesives may weaken, causing tiles to loosen or fall off. Routine wear and tear can affect tiles, particularly if the pool is used heavily.
2. Identifying Tile Issues
Before beginning repairs, it’s essential to identify the nature and extent of the damage. Look for:
- Cracked or Chipped Tiles: Cracks may be superficial or go through the tile entirely, often requiring replacement.
- Loose or Missing Tiles: Loose tiles can still be repaired, but missing tiles will need to be replaced.
- Grout Deterioration: Worn grout can cause tiles to become loose and lead to water seeping behind tiles, which can damage the pool wall or structure.
3. Step-by-Step Pool Tile Repair
With the right tools and methods, you can effectively repair damaged tiles yourself. Here’s a step-by-step guide for DIY tile repair:
Step 1: Gather Tools and Materials
For tile repair, you will need:
- Replacement tiles (if necessary)
- Tile adhesive (waterproof and pool-safe)
- Grout (suitable for underwater use)
- Grout sealer
- Tile spacers
- Chisel and hammer
- Putty knife or small trowel
- Tile sponge
- Safety goggles and gloves
Step 2: Drain the Pool (if required)
If the damaged tiles are located at or below the waterline, you may need to lower the water level to expose the repair area fully. For tiles above the waterline, this step can be skipped.
Step 3: Remove Damaged Tiles and Grout
Wear protective gear and use a chisel and hammer to carefully remove any loose or damaged tiles. Place the chisel at the edge of the tile and tap it gently to loosen it without damaging adjacent tiles. If old grout is deteriorating, scrape it away with the putty knife to create a clean surface for reinstallation.
Step 4: Clean the Area
Thoroughly clean the area where the tiles were removed, removing any adhesive residue, debris, or old grout. This step is essential to ensure a strong bond for the new adhesive.
Step 5: Apply Adhesive and Set the New Tile
Apply a small amount of waterproof adhesive to the back of the replacement tile or directly onto the pool surface. Use a trowel or putty knife to spread it evenly. Press the tile firmly into place, aligning it with the surrounding tiles. Use tile spacers if necessary to maintain consistent spacing.
Allow the adhesive to set according to the manufacturer’s instructions, usually for 24 hours, to ensure a secure bond.
Step 6: Apply Grout
Once the adhesive has fully cured, apply grout between the tiles using a grout float or putty knife. Press the grout firmly into the gaps, removing excess grout as you go. Use a damp sponge to wipe away any remaining grout on the tile surface, being careful not to disturb the grout lines. Allow the grout to cure as per the product’s instructions.
Step 7: Apply Grout Sealer (Optional)
For added protection, apply a grout sealer once the grout is completely dry. This helps prevent water and chemical infiltration, protecting the grout and surrounding tiles.
4. Tips for Preventing Future Tile Damage
Regular maintenance and proper pool care can prevent tile damage and prolong the life of your pool tiles. Here are some useful tips:
- Maintain Proper Water Chemistry: Regularly test and balance your pool’s pH, alkalinity, and calcium hardness levels. Proper water chemistry reduces mineral buildup, which can weaken tiles over time.
- Use a Pool Cover: Covering your pool when not in use helps protect tiles from UV damage, debris, and weather-related wear.
- Perform Routine Inspections: Check your pool tiles for early signs of damage, such as small cracks or loose tiles. Addressing these minor issues promptly can prevent larger, more costly repairs.
- Avoid Impact Damage: Be cautious with pool cleaning tools and equipment around tiles. Avoid bumping or dragging hard tools on tile surfaces, as this can cause chipping.
5. When to Call a Professional
While small repairs can often be handled on a DIY basis, there are times when professional assistance is the best choice:
- Extensive Damage: If multiple tiles are loose or missing, or if there are significant cracks across large sections, a professional pool technician can ensure a thorough repair.
- Structural Issues: If you notice cracks in the pool shell or surrounding areas, this could indicate structural issues that require expert assessment and repair.
- Specialized Tile Work: Custom or intricate tile patterns may benefit from a professional’s precision and expertise to maintain aesthetic consistency.
Conclusion
Swimming pool tile repair is essential for maintaining the functionality, safety, and aesthetic appeal of pool surfaces. By addressing cracked, damaged, or loose tiles promptly and using appropriate repair methods and materials, pool owners can ensure their pools remain in optimal condition for years to come. Regular inspection, proper maintenance, and adherence to safety precautions contribute to effective tile repair and enhance the overall enjoyment and longevity of swimming pool environments.


